Out of the box, your computer is shipped with a terminal as a powerful way to interact with the device. Great to use when copy-pasting snippets found on StackOverflow. But in case you use it more often, you notice it lacks quite some features.
So you want be much more productive in your terminal?
You’re at the right place. This article explains how to change your terminal and be more productive. Also it will look cool.
In this article macOS will be used as OS in the examples.
Install Homebrew
Most of the commands used in this article are using Homebrew, the package manager for macOS.
To install Homebrew, open your terminal and paste the following command:
/bin/bash -c "$(curl -fsSL https://raw.githubusercontent.com/Homebrew/install/HEAD/install.sh)"
Download iTerm2 (or another terminal)
iTerm2 is an alternative for the default macOS terminal. Advantages of iTerm includes better pane splitting and better customizing.
Other alternative terminals to check out are Alacritty, kitty and Warp. All the mentioned plugins will work in these terminals as long as you use zsh (Z shell) as shell.
To install iTerm2 run the following command:
brew install --cask iterm2
Change the theme of iTerm2
cd ~/Downloads
curl -O https://raw.githubusercontent.com/mbadolato/iTerm2-Color-Schemes/master/schemes/Dracula.itermcolors
- Open iTerm2
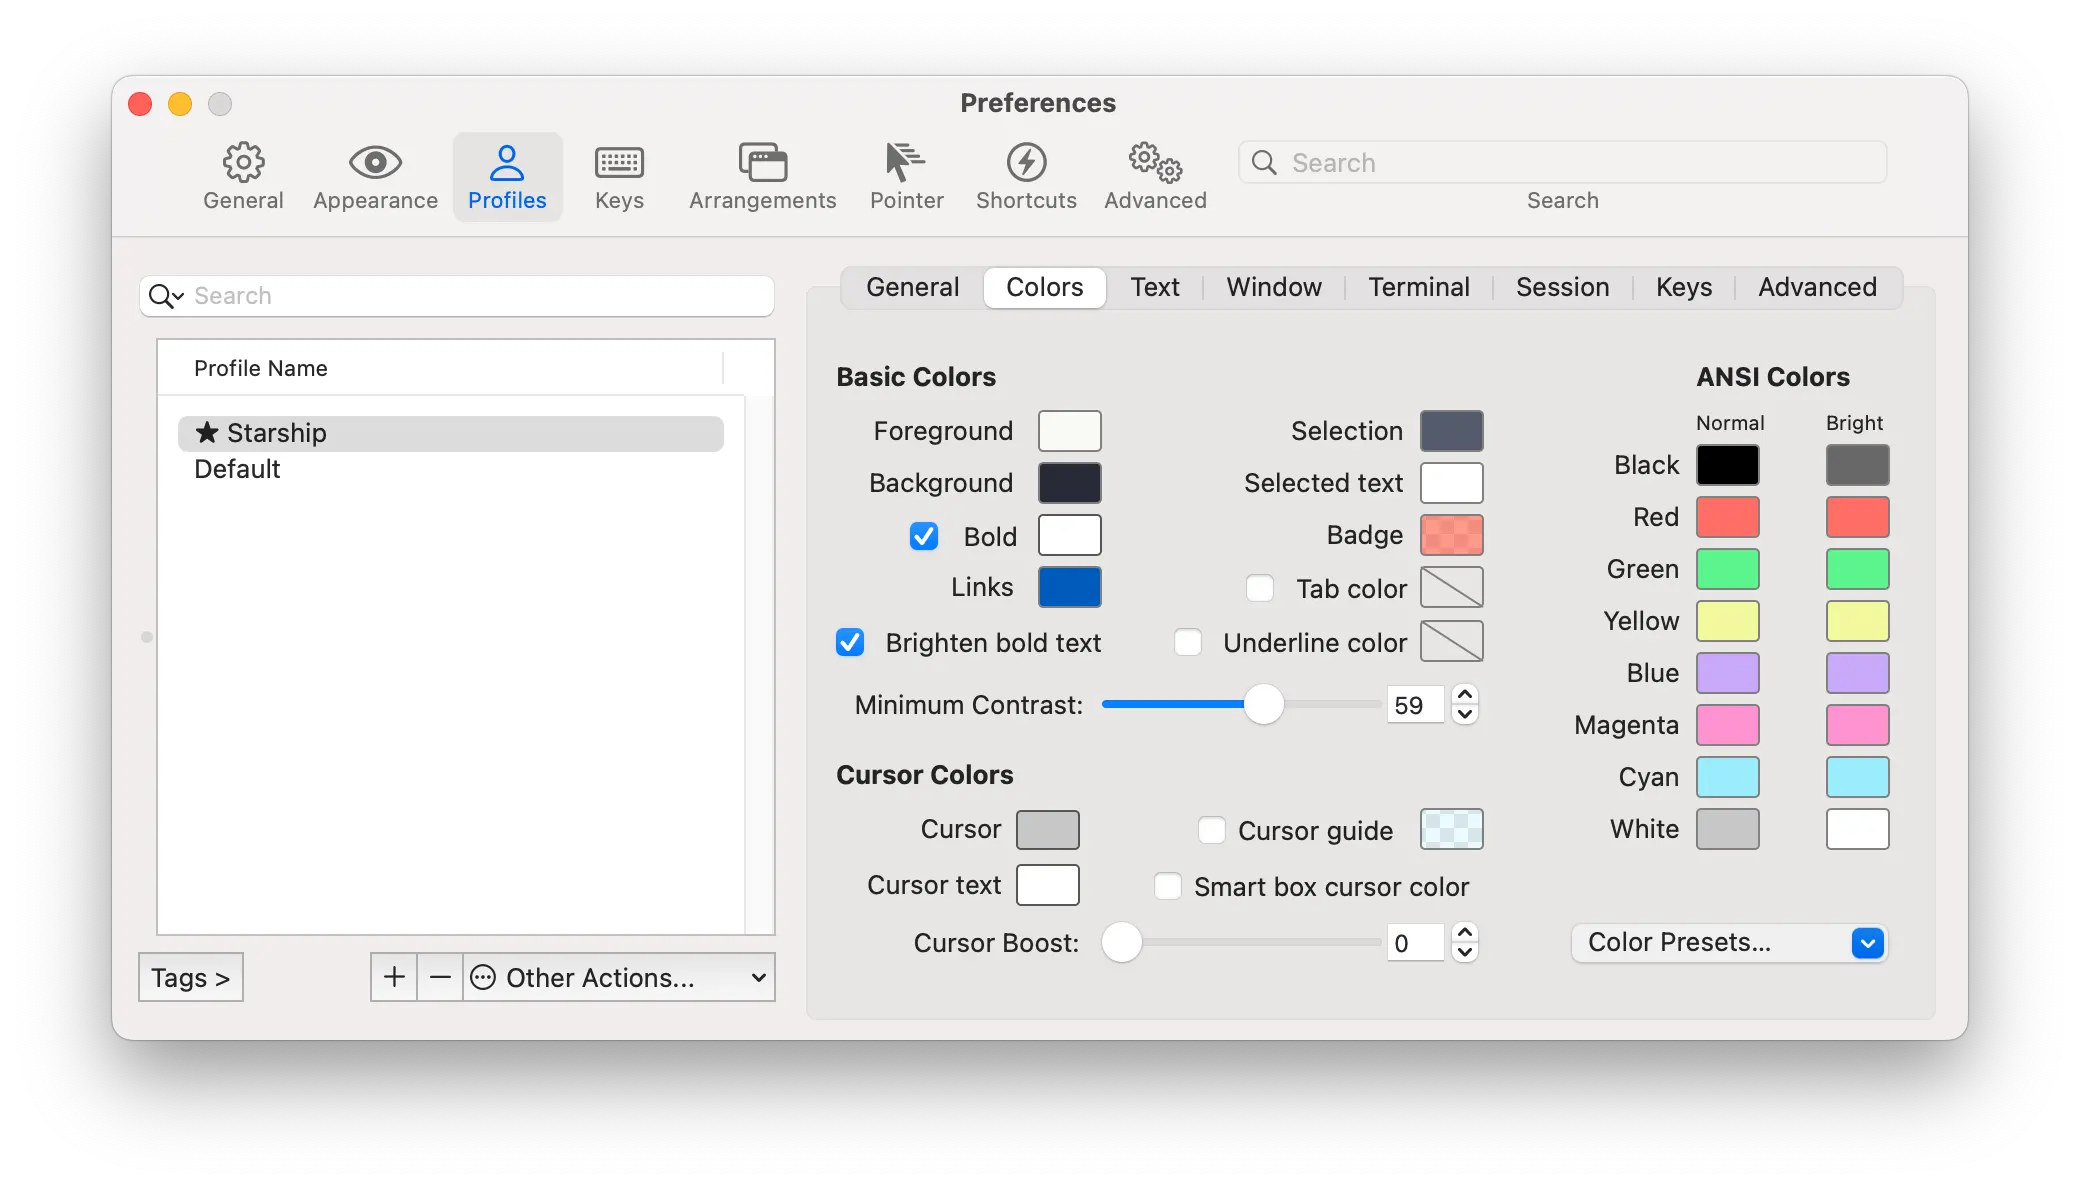
- Go to Settings… → Profiles → Colors Tab
- Click Color Presets… at the bottom right
- Click Import and select the downloaded
Dracula.itermcolorsfile - Select the Dracula from Color Presets…
Install Oh My Zsh
When you open up a terminal, the system launches a shell program. Shells are command line interpreters which, put simply, means they take your commands and give them to the operating system to put into action.
Since macOS Catalina zsh (Z shell) is the default shell. Oh My Zsh is an open source, community-driven framework for managing your zsh configuration.
Install Oh My Zsh:
sh -c "$(curl -fsSL https://raw.githubusercontent.com/ohmyzsh/ohmyzsh/master/tools/install.sh)"
Enable plugins
Oh My Zsh comes with a load of plugins for you to take advantage of. Take a look at all the plugins in the directory.
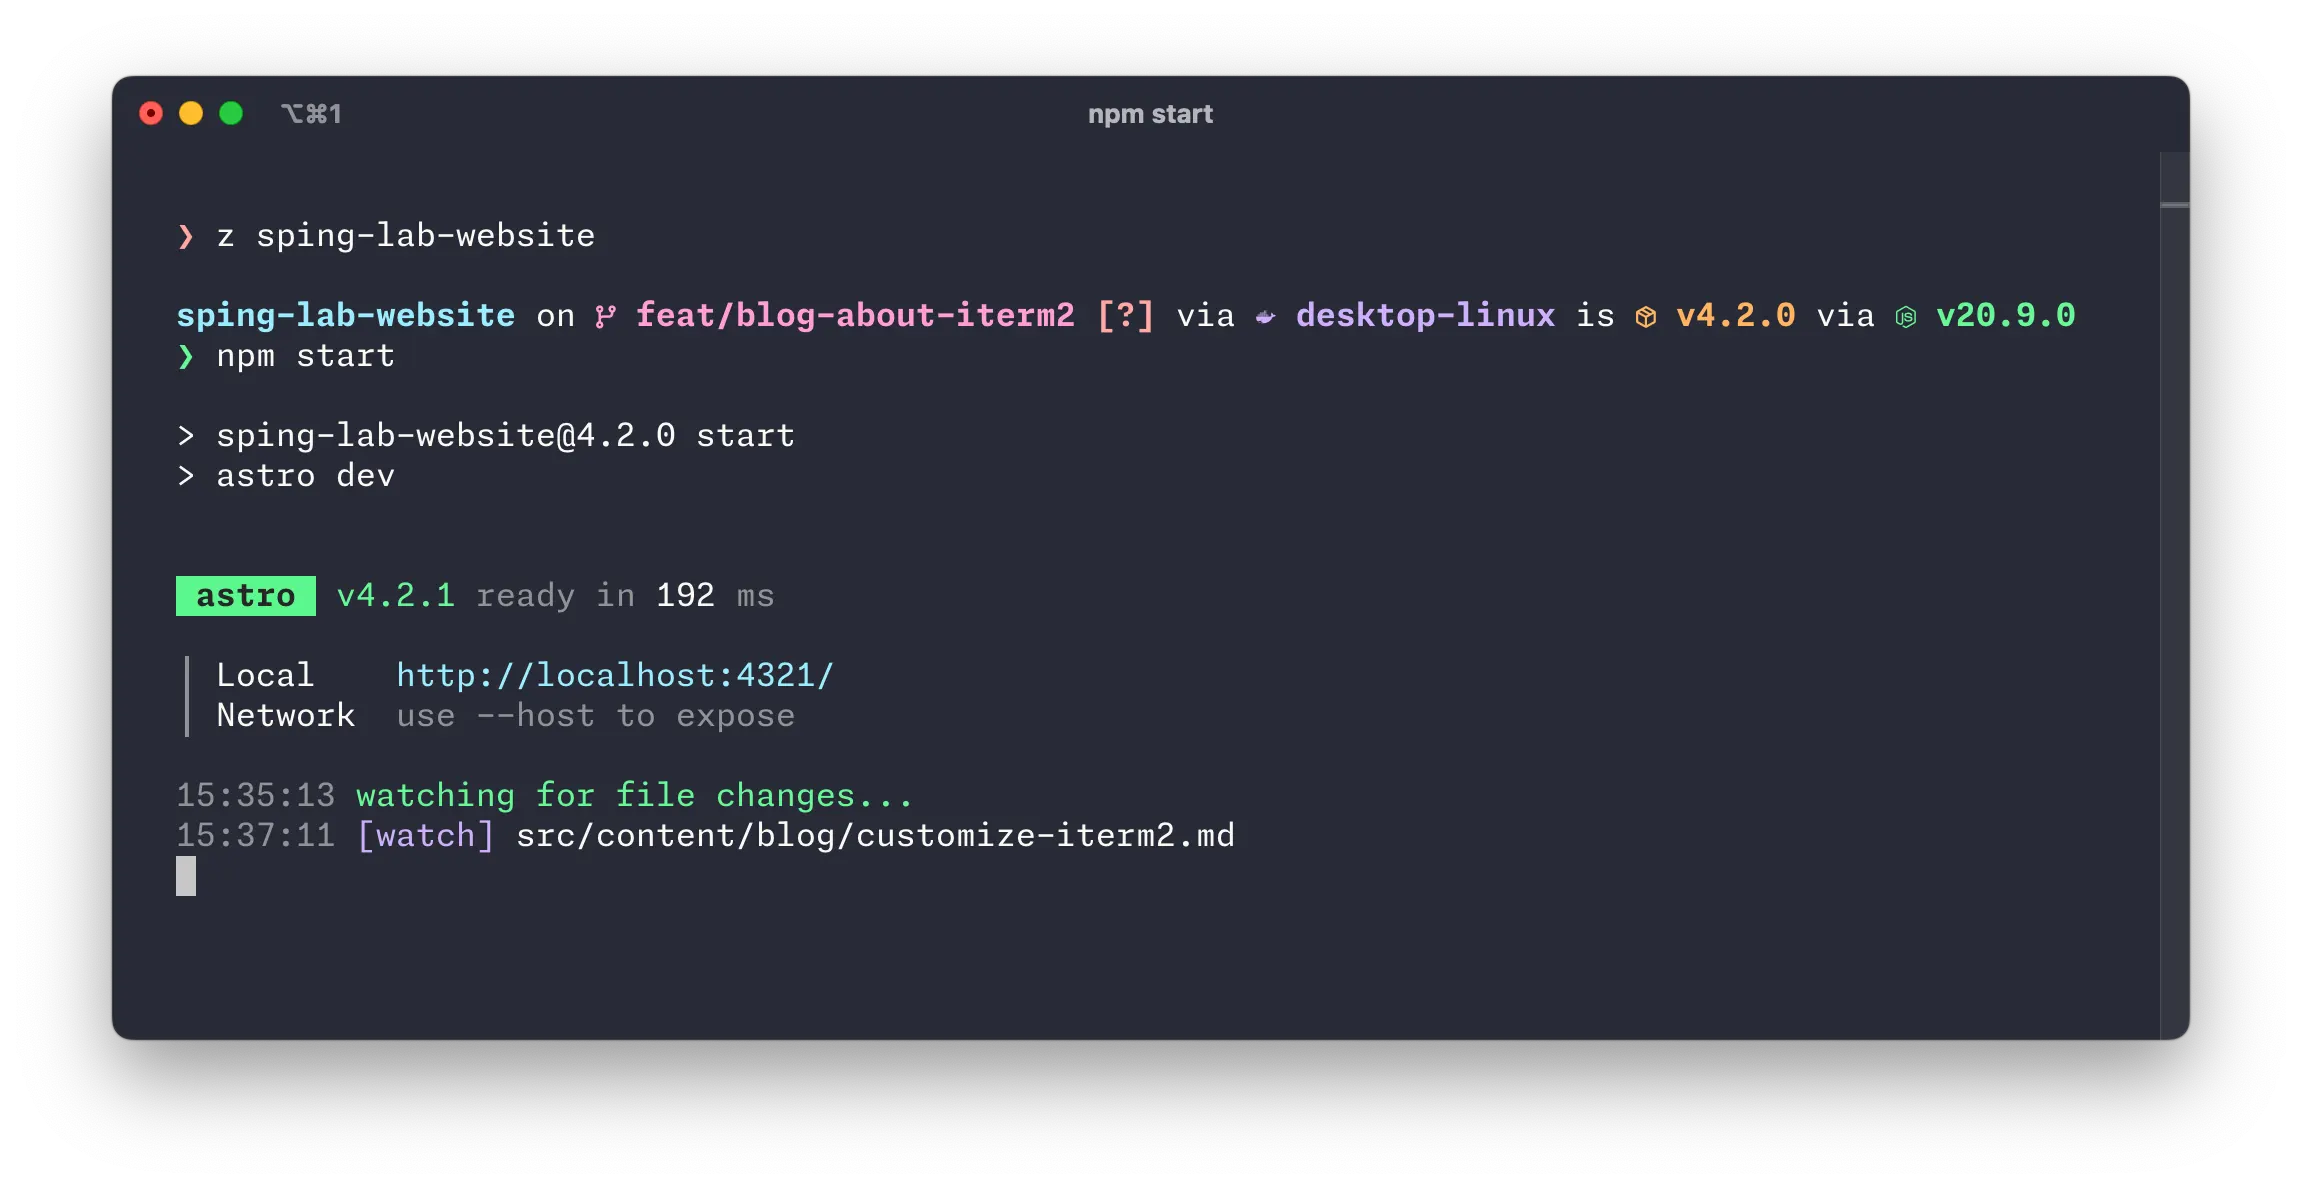
One of our favorites is z. The z command tracks your most visited directories and allows you to access them with very few keystrokes.
Run this command to enable plugin ‘z’:
nano ~/.zshrc
Add the ‘z’ plugin to the list
# ~/.zshrc

# Which plugins would you like to load?
# Standard plugins can be found in $ZSH/plugins/
# Custom plugins may be added to $ZSH_CUSTOM/plugins/
# Example format: plugins=(rails git textmate ruby lighthouse)
# Add wisely, as too many plugins slow down shell startup.
plugins=(
    git
    z
)
After a few hours of moving around, you can use the z command followed by a word that is in your directory.
z downloadsmight bring you to~/Downloadsz websitemight bring you to~/projects/my-website
Install Starship
With Starship you can customize your prompt. This works for any shell.
First install a Nerd Font. Nerd fonts include a high number of gyphs (icons). For example try Monaspice Nerd Font, based on GitHub’s Monaspace.
Change the font in iTerm2. Do this by going to:
- Settings → Profiles → Text Tab
- Select your font
Then install Starship:
brew install starship
Add the following line to the end of ~/.zshrc:
# ~/.zshrc

eval "$(starship init zsh)"
And configure a preset:
starship preset nerd-font-symbols -o ~/.config/starship.toml
You’ll find other presets on the Starship website. Or you create your own.
Install zsh-autosuggestions
The last step is to install zsh-autosuggestions. It suggests commands as you type based on history and completions.
brew install zsh-autosuggestions
To activate the autosuggestions, add the following at the end of your .zshrc:
# ~/.zshrc

source $(brew --prefix)/share/zsh-autosuggestions/zsh-autosuggestions.zsh
And there you have it! Your most powerful terminal is ready to rumble. Want to go even further? Check out the other themes and plugins to customize your terminal even more.